Saturday, October 18, 2014

Making a mud brick art studio in 10 easy steps.

We recently helped our first Australian WWOOF hosts with their mud brick art studio. It was an awesome experience that relied heavily on our favorite three R's - reducing, reusing, and recycling! We thought we'd share our hosts' process for anyone who's interested. Adapt and adjust to suit your needs...

~~~~~~~~

1. Clear the land you want to use. It really helps if you have lots of land to choose from and/or the land has been in your family for decades because you can pretty much build the art studio wherever you want.

like here, for example
(not pictured: actual original location of mud brick art studio)

2. Lay the foundation and in the 3R spirit, use the felled trees as wall beams.
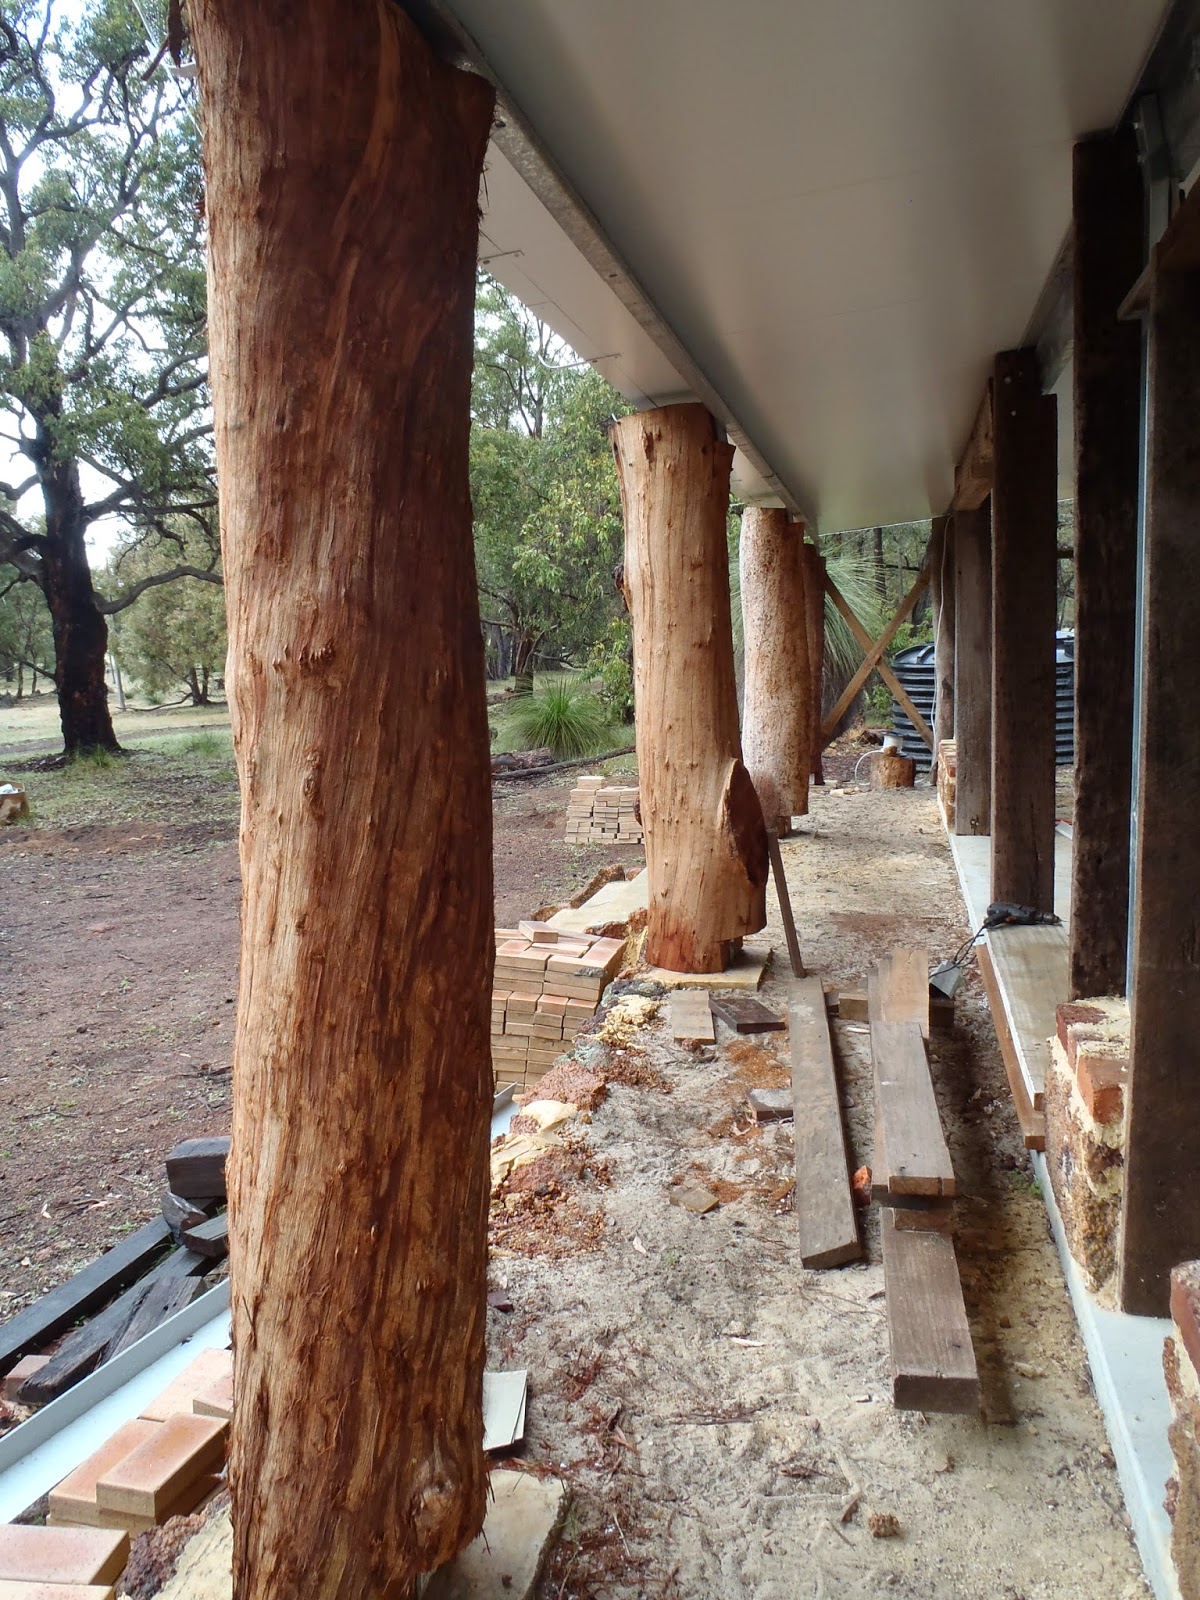
peel off bark as time permits

3. Again with the 3Rs - make a bazillion mud bricks using mud from the dam on your property and a homemade brick mold. (We hear it's best to do this work all by yourself in 45C weather... next to the dam in your swim trunks.)

make sure each mud brick weighs at least 159kg when dry

4. Come to your senses and get some WWOOFers on board! They can do the pesky hard work of sifting mud to use for mortar...

Jen, Patrick, and Rori getting the lumps out

... while you go for a swim, pet the family emu, and set things on fire.

Andrew "working hard"

5. Go back to the construction site, mix your mortar, get your setup right and start laying those bricks!

mark off the wall height and use a string to keep it straight

slap some mud mortar down and lay the bricks,
then trowel mud mortar in between the bricks for a tight seal

constantly check that everything's level

pause for funny photo ops

6. Smooth the exterior mortar so that it looks presentable. In this case, Gina called it "piping" because an actual small PVC pipe elbow was used to press the mud in tight and make those nice lines. The mortar should be firm but not dry when you "pipe."

Gina demonstrates "piping"

mud cleans up real nice
(and when it doesn't? just add water and fix!)

7. To continue with the 3R theme, find a bunch of old windows and doors. Best if they're free, have a neat story behind them, and/or don't match but still go well together. Have your WWOOFers scrape the paint off the windows and doors to give them that "rustic" look.

be sure the paint is very, very thick
and sometimes soaked into the wood just for added fun
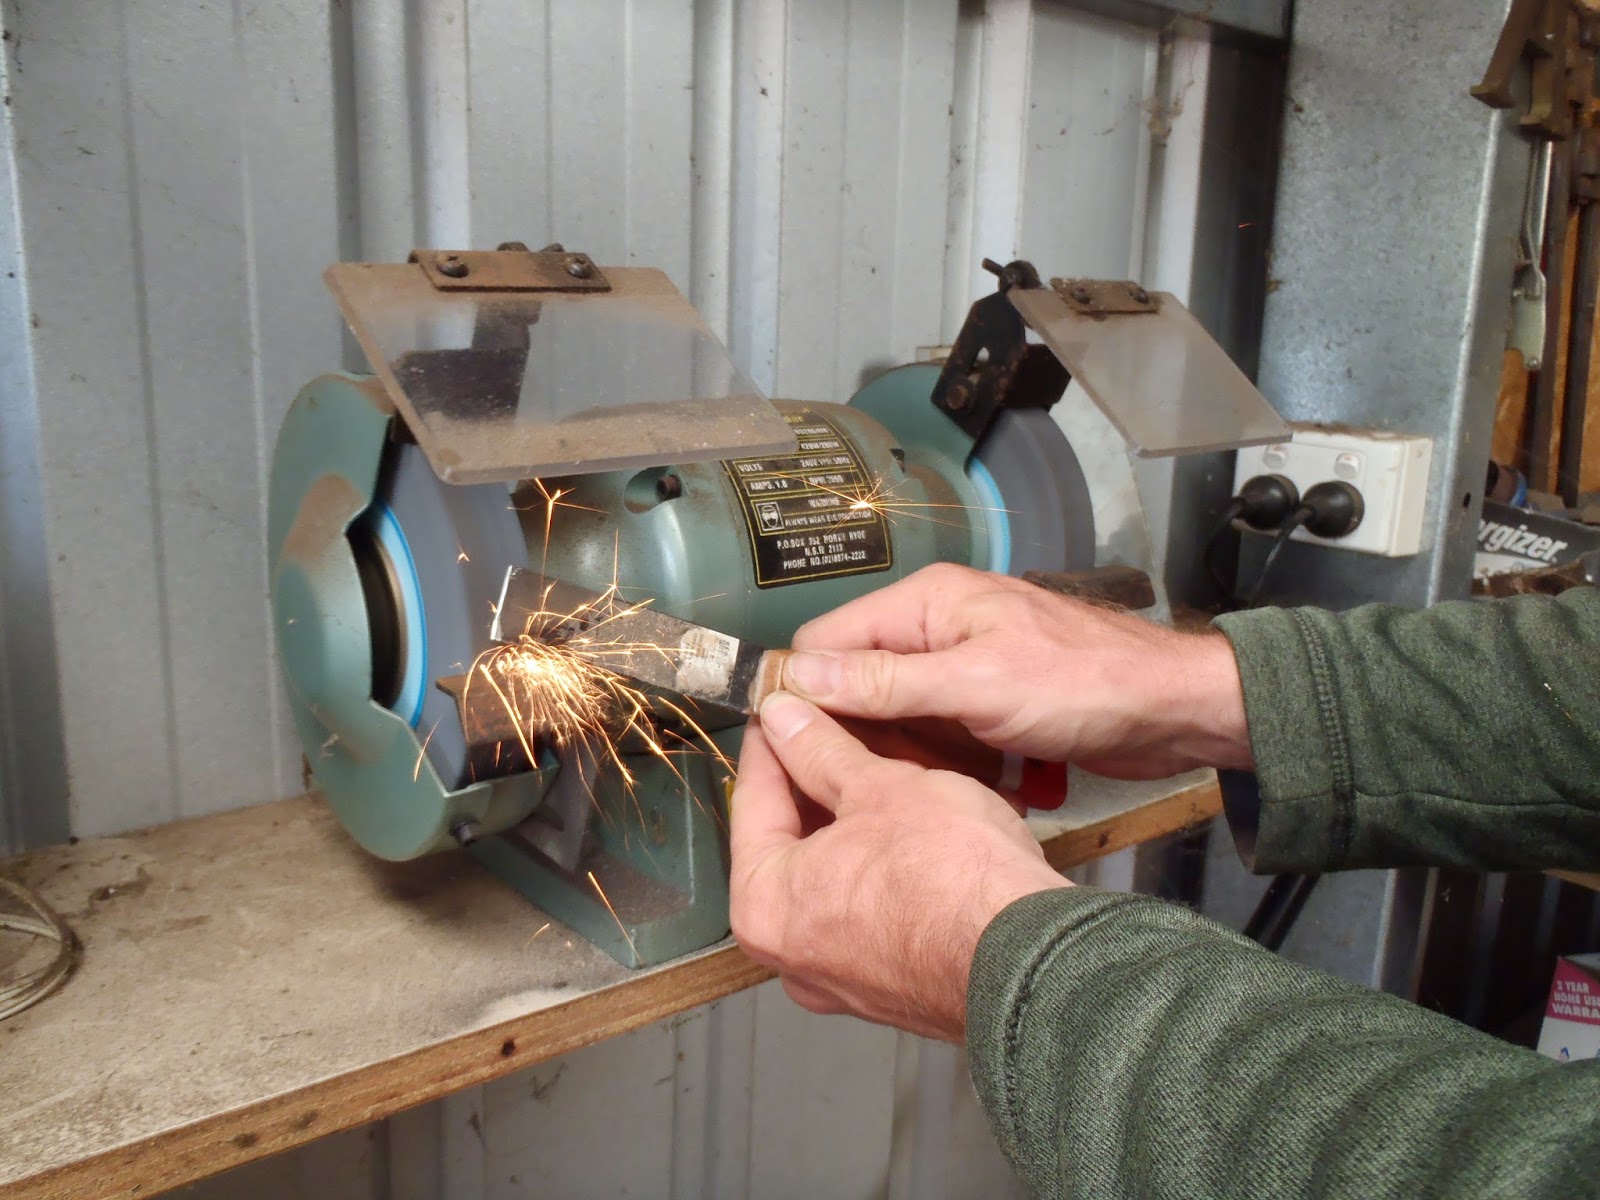
mention your metal file and see how fast the WWOOFers run
to sharpen their scrapers
(be sure to wait until they're almost done with the frame though!)

8. Install the windows and doors in your new studio. Odd shapes and sizes don't really matter because you can just cut the mud bricks to fit around the frames. (Neat idea: old doors on their sides make really cool windows!)

oh hai!

9. Apply a thin layer of mud to the interior walls to give them a nice finished look.

Rori's masterpiece

10. Enjoy your new mud brick art studio! This one is not complete yet - our hosts aim to finish up by December. They'll offer their own art classes and also lend the space to fellow artists, musicians, and other teachers of interesting topics... such as, perhaps, eco-building?

the art studio: art itself

~~~~~~~~

Okay, some of the steps here are a bit tongue-in-cheek, and we're just kidding about Andrew goofing around - he and Gina both put in 150% every day, especially when it came to the art studio.

More on our stay with Andrew and Gina coming soon. But one final thought on the art studio... Considering the amount of care that went into every step, the thoughtful use of available materials, the energy and spirit behind the project, and the beautiful result, we have to say that this is one of the coolest projects on our WWOOF resume so far.  Although we can't say we want to try making a mud brick art studio at home, we've taken away tons of 3R ideas using existing materials in everyday home projects. (Oh, and a brick pizza oven is now very high on our wish list!)

Now, if we could just figure out where "home" is...

Friday, October 10, 2014

Nepal on $30.50/person/day.

Nepal is the first country where we've exceeded our initial budget. We were FIFTY WHOLE CENTS per day over! For 27 days! Do you know what you can buy in Australia for $13.50?

(Not much.)

It was mainly the food. Our meals in Nepali restaurants ran about $4/person and meals on the trek were about the same. We ate 99% vegetarian, too - even with all those fat lovely chickens running around, eating meat would've been significantly more expensive. Flights into Nepal were the other big cost.

Anyway, here's the lowdown...

Initial budget: no more than $30/person/day
Actual cost: 27 days at $1642 ($61/day, $30.50/person/day)


fun fact: Nepal has the world's only non-quadrilateral flag
(it makes a great "E")

  • Lodging: $154 - 26 nights at guesthouses averaging $1-2/person/night on the trek and $5/person/night in cities
  • Transportation: $398 - includes our flight from Bangkok; public transit around Kathmandu, to Bhulbhule, and back to Kathmandu; and a $20 taxi ride to Pokhara after our trek
  • Groceries: $68 - bottled water and snacks
  • Meals: $604 - food in Nepal is expensive!
  • Tours: $228 - $137 for our trekking permits; a generous donation to our friend's trekking guide who consulted with us before our trek and who is starting his own company; nominal entry fees for museums and other attractions
  • Alcohol: $19 - gross expensive beer and delicious cheap raksi (local rice wine)
  • Gear: $55 - random items for the trek; a few locally made shoulder bags to replace our dying ones; new flip-flops for Patrick
  • "Misc": $36 - hiking meds; donations to temples and local schools along the trek; nominal costs for laundry and WCs
  • Border: $80 - $40/person for a 30-day tourist visa

Other fun Nepal facts...
  • Cities visited: 3 (Kathmandu, Patan, Pokhara)
  • Villages visited along the trek: can't count that high
  • Top ten highest mountains photographed: 2 (Annapurna I, Dhaulagiri)
  • National parks visited: 0 (um, but we trekked the freakin' Annapurna Circuit)
  • UNESCO World Heritage Sites visited: 1 (Kathmandu Valley)
  • Kilos of carbs consumed during our trek: 83 million

Now back to what they call dollars, and what we call "THAT COSTS HOW MUCH??!" To Australia!

Thursday, October 9, 2014

Starting and ending in Nepal: Kathmandu and Pokhara.

We'd heard mixed things about Kathmandu - it's like going back in time, the airport is a mess, the city is beautiful and full of culture, the smog is horrendous ("wear a mask!"), the people are lovely, it's pretty touristy, the traffic is insane...

From our perspective, all of that was true.

namaste, Kathmandu

We arrived the day of a festival. In a haze of jetlag, we watched our taxi weave through dusty unpaved streets, narrowly avoiding hundreds of Hindu ladies dressed in beautiful red saris who had danced at the festival. (I wish I'd taken some subtle photos - they were all stunning, especially against the backdrop of dull brown buildings and dirt roads.)

Later that day and the next day we wandered around the outskirts of the tourist area to get a feel for the city. Masses of people, cars, motorbikes, cafes, narrow medina-like shops along the side streets selling anything you could possibly need...

country #15, protest #7

not sure what these flags were about,
but they were pretty

Kathmandu had an energy like we'd felt in western Morocco only there was something much more positive about it. Crazy motorbikes aside, we really liked it.

We spent about five days in Kathmandu, half at the very beginning and the other half at the very end. For convenience and trek prep reasons we spent more time than we would've liked in the tourist part of town. This is where the cheap gear is sold, where the restaurants have western food and Nepali/Indian dishes are written in English on menus, and where you can get a really good cup of coffee (for a price).

farangville

On every corner we were barraged by cyclo drivers wanting to give us a ride or people pushing trekking guides, trekking companies, Tiger Balm, musical instruments, you name it. I was constantly approached by men wanting to fix my holey boots. The conversation always went like this:

Him: "Madam! I can fix your boot!"
Me: "It's okay, thank you."
Him: "It's NOT okay! It's broken! I can fix it."
Me: "No, I don't need it fixed, thank you though."
Him: "You DO need it fixed! Good price!"

Sometimes this went on for a minute or two. A few of the men actually seemed pretty concerned about my boots, frowning and pointing to the year-old holes as they peddled their assistance. One guy followed me down the street pushing his boot repair service, saw me again ten minutes later and followed me back up the street.

Yep, a lot like western Morocco. Only they were a lot nicer here. And no one offered to give Patrick a shave.

Pokhara, our three-night stop after the Annapurna Circuit, was quite different. The streets were paved, there were actual sidewalks, there was a beautiful giant lake in the center of town...

Phewa Lake

Really nice houses lined the streets skirting the center of town and even the outskirts of town were far nicer than anything we saw in Kathmandu. Everyone spoke English and half the people you saw on the streets were tourists... After a few days we'd had enough and were ready to get back to Kathmandu's craziness.

Seven days sounds like forever but we actually didn't have a lot of time to take in cultural sights in either city. We did briefly visit Patan, one of three royal cities in the Kathmandu Valley which dates back to the 14th century. Even though it's a tourist destination, locals pretty much leave you alone so we spent an afternoon just wandering. Patan is a mecca for artisans but we didn't see too much of that - we mainly checked out Patan Durbar Square (really beautiful) and nearby Mahaboudha Temple featuring thousands of tiny terra cotta carved Buddhas (so cool!).

ancient temples

take one down and pass it around,
999 statues of Buddha on the wall

We also briefly visited Swayambhunath Temple, one of the most sacred Buddhist sites in the country. It was an interesting site but a lot of the symbolism was lost on us despite the efforts of a nice local man who gave us a very fast-talking unsolicited tour and then held out his hand for payment.

Swayambhunath stupa

the views from the top were nice though

In Pokhara we joined our new guesthouse friend on his city tour. It was quite a whirlwind couple of hours but we saw a few things we wouldn't have otherwise seen...


and this odd Seti River Gorge aquaduct
in the middle of town

and the amazing sunset from Sarangkot view point

We also visited the fantastic International Mountain Museum where we learned a ton about mountaineering history, the geology of how the mountains were formed... and of course, yetis.

grrr argh

And that was our seven days in Kathmandu and Pokhara.

Food notes: where to even begin...

"typical Nepali" dinners looked like this...

... or sometimes this

dinner at Shree Lal, our favorite Kathmandu restaurant,
looked like this (we ate here four times)

pakoras were everywhere...

...but we only saw peanut masala once
(and immediately devoured it)

the best lunch eats in Kathmandu

lentil pastry things from a street shop -
sooooo tasty

Pokhara's Pacific Northwest coffee shop

Lodging notes:
  • Kathmandu's Madhuban Guesthouse was just fine - good location, nice staff, and they stored our bags for three weeks while we were trekking.
simple and spacious

    When we got back, they were full but their partner hotel had availability so we went to...
  • Kathmandu's Mountain Peace Guesthouse - really nice, set back on a quiet street with nice rooms, fast wifi, and a picnic area on the balcony. Highly recommend!
  • Pokhara's Hotel Serenity was absolutely no fun - characterless rooms, indifferent staff, and the strangest "one towel per room don't care how many people you are you only get one towel" policy. We left the next morning and went to...
  • Pushpa Guesthouse (right across the street from Hotel Serenity) - AMAZING! Lovely room, lovely owner Raj and family, great location, great price. Highly recommend!
mountain view included in price

Shopping notes: we don't normally shop, but in Kathmandu we had the honor of meeting this lovely young lady and we bought a few things to support her co-op. Please do the same if you visit!

Local Women's Handicrafts: a very good cause

our new stash

Nepal was our last non-western country on this journey and we loved almost every minute. We hope to return someday for additional trekking and a proper education on Nepali culture.

As I write this we're sitting in a caravan just outside of Perth, WWOOFing for an organic vintner. We just wrapped up 10 days WWOOFing at an eco-farm up the street. We're frantically making train reservations and arranging future WWOOF stays to minimize our costs in Australia. We miss the days of showing up and finding a hotel for the night, wandering the streets looking for tasty, inexpensive snacks, and the strange looks when we walk into a shop.

But the transition from Asia has been surprisingly easy. As we travel in comfort and eat familiar food, I am worried that we'll forget about the beautiful cultures and people we met along the way. And I don't want to forget how to live simply. There must be a balance between this and that... I'm officially on a quest to find it.

Tuesday, October 7, 2014

Slowly, slowly around the Annapurna Circuit.

The Annapurna Circuit is one of the most popular and beautiful treks in the world. Thousands of foreigners flock to this area of the Himalayas each year to claim bragging rights to this physical endurance test that features about 220km of trail and a maximum elevation of 5,416m (also known as 17,764f).

brag brag brag

Tell any Nepali you're doing a trek in the surrounding mountains - doesn't matter which trek, how long, how high - and they will all give the same advice: "bistari, bistari" ("slowly, slowly"). After 17 months and 14 countries we think this is pretty good advice. So when we decided to try the Annapurna Circuit during our month in Nepal, we followed this advice... and we had an amazing time.

Our itinerary
The circuit usually takes 17-21 days depending on rest days and side treks. We gave ourselves 21 days; we ended up trekking for 18 of those days, for about 6 hours a day on average, with one rest day. In the end we wished we'd allowed more time for rest (or as we called it, "sitting on the porch staring at the beautiful mountains for hours and hours and hours") and additional side trips.

Here was our schedule:

Day Start Village End Village Max Elevation (m) Max Elevation (f)
1 Kathmandu Bhulbhule 840 2,755
2 Bhulbhule Ghermu 1,310 4,297
3 Ghermu Sattale 1,680 5,510
4 Sattale Bagarchhap 2,160 7,085
5 Bagarchhap Chame 2,670 8,758
6 Chame Upper Pisang 3,300 10,824
7 Upper Pisang Manang 3,670 12,038
8 Manang Day hike to Ice Lake 4,600 15,088
9 Manang Shree Kharka 3,800 12,464
10 Shree Kharka Ledar 4,200 13,776
11 Ledar High Camp 4,925 16,154
12 High Camp Muktinath 5,416 17,764
13 Muktinath Muktinath 3,760 12,333
14 Muktinath Marpha 3,760 12,333
15 Marpha Kalopani 2,670 8,758
16 Kalopani Dana 2,530 8,298
17 Dana Sikha 1,935 6,347
18 Sikha Ghorapani 2,860 9,381
19 Ghorapani/Poon Hill Birithati 3,193 10,473

Generally speaking, we left around 7am and finished somewhere between 2-3pm. This included at least one tea/snack break and a break for lunch. (And also at least 30 minutes to allow for photos!)  Day 19 was the exception - we had to leave Ghorapani around 4:15am to catch the Poon Hill sunrise and then ended up trekking straight through to arrive in Birithati around 4pm. We don't recommend that and we wish we would've stayed in one of the hillside farm villages that last night before ending our trek.

Our gear list
Since we'd been traveling light for the past 17 months, paring down our packs even further wasn't a big deal. We ended up just using Patrick's large backpack and medium-sized daypack which gave us plenty of room.  We trekked in September so we didn't need to bother too much with bulky things for warmth, but colder weather would definitely have required two large backpacks.

What we each brought:
  • packing gear: 3-4 stuff sacks for keeping dirty clothes separate from really dirty clothes, 2 dry bags for keeping electronics safe, plastic bags for everything
  • clothing gear: 2 pairs of convertible hiking pants, 2 short-sleeved shirts, 2 long-sleeved shirts, 4-5 pair of quick dry underwear, 1 fleece, 1 smartwool long-sleeved, 1 raincoat/windbreaker, scarf, gloves, fleece/long john pants
  • head gear: 1 wool winter cap, 1 sunhat, 1 bandanna, comb, hair bands
  • foot gear: boots, flip flops, 3 pair thick hiking socks, 2 pair lightweight socks
  • sleep gear: pajamas (in our case this was some combo of the clothing gear above that was sort of clean at the time), sleep sack (Jen's doubled as a scarf when it got really cold)
  • night gear: headlamp and extra batteries, book (there are a few exchanges/used book stores along the trek)
  • water gear: 2 Nalgene water bottles, SteriPen and extra batteries, water purification tablets, tea bags to remove the chemical taste from the tablets
  • sun gear: sunglasses, sunscreen, umbrella for shade (and occasional rainshowers)
  • paper stuff (sealed in a ziplock): permits, passport, rupees in small denominations
  • toiletries (just a small amount - almost everything is available along the trek): soap, shampoo, toothbrush/paste, toilet paper, kleenex, lotion, quick-dry towel
  • general first aid: band-aids, moleskin, tape, neosporin, advil, electrolytes, nail clippers, altitude sickness and stomach bug pills (we didn't use either but were happy to carry them just in case)
  • electronics:  mobile and charger (which were mostly used to consult trekking PDFs and crosswords we'd downloaded - there is very little wifi along the trek), camera and charger
  • essentials for any trip: a good map, a little duct tape, a small bottle of superglue

What we didn't bring (and why):
  • a laptop (they're heavy and the batteries don't last long at altitude or in cold altitude)
  • sleeping bags and down coats (it was September - the weather was really mild, and where it wasn't, the guesthouses had nice thick blankets)
  • walking poles (we find these annoying but others swear by them)
  • ponchos (a fellow blogger recommended umbrellas instead, since ponchos just make you hot - the umbrellas ended up being more useful for shade protection than rain)
  • laundry detergent for handwashing clothes (we've found that bar soap works just as well, but you can also buy laundry bars in villages or have your clothes washed if you have time)
  • heaps of food (there were stretches here and there where villages were 3-4 hours apart but otherwise, you could easily find a packaged snack of some sort in every village)

What we wish we'd brought (and why):
  • lithium batteries for the SteriPen (or at least rechargeable batteries - the SteriPen eats regular batteries and then you're just carrying dead weight)
  • throat lozenges, hand lotion and chapstick (after 6 months in humid SE Asia we didn't even think about dry, cold air or chapped skin/lips - but again, these are available along the trek)

One note about gear and trekking in general... Porters, guides, or a combo porter/guide are available for those who choose these services. It's a serious job with a lot of responsibility (and daily potential for injury, illness, and dealing with stupid tourists). Hiring these men and women helps the local economy and ensures trekker safety, and those who speak English can give cultural context for the villages all around the circuit.

That said, we chose not to hire a porter or a guide. The trail is very well marked, and given our fitness and trekking experience we didn't expect any problems. In addition, hiring people to accompany us would have almost doubled the cost of our trek as well as forced these two introverts to be social for three weeks - exhausting just to think about!  Plus, we simply aren't comfortable having someone else lug our stuff up and down mountains. We even decline help with our bags at hotels.

And the biggest reason we didn't hire a porter or guide... surely a guide would have provided lots of interesting local and cultural information, but honestly after almost a year of local and cultural overload we just wanted to be alone in the pretty mountains for a few weeks before starting the final leg of our journey. We feel bad short-changing Nepal's rich culture and history but we have a feeling we will be back again someday, and at that point we'll be ready to absorb it all.


but here is a little bit of the culture


and here is a little more

If you do trek and do hire a porter, for the love of all that is holy please do not make the porter carry your laptop, your hair dryer, your ginormous roller bag of luggage, a hardback copy of War & Peace, or three pairs of hiking boots - these should be your burden to bear. Wandering Sasquatch, who also has lots of good tips, had a good idea that porters should charge by the kilogram, and we wholeheartedly agree.

The trail
We followed lots of advice from various blogs and online guides as well as fellow trekkers, but we mostly relied on the free 2011 version of the New Annapurna Trekking Trail (NATT). The time estimates were right on and the detailed information about the trail was invaluable. There is an updated version available for purchase but let's face it... this is Nepal, things don't change that quickly.

 well-marked all along the way

There's a handy brochure you can get at checkpoints along the trail that shows elevation gains/losses to help you plan your days. There were only a few days where the elevation gains/losses were rather painful (Upper Pisang-Manang, Ice Lake in Manang, and our last day of -1800m loss including a 500m descent down uneven stone stairs). Otherwise it was a pretty easy trek - which is why it's so popular.

A road has been built along a large part of the trail that is both a blessing and a curse. The blessing is that it increases services to local villages, and enables tourists who wouldn't necessarily trek to visit bigger villages and spend their tourist dollars. The curse is that trekkers follow this road for large stretches so it takes away somewhat from the "trail" experience (unless you venture off on the side trails that ACAP has recently established, which can take longer and be washed out during rainy season).

The road also takes away from businesses who have relied on trekkers coming through each year. More than a handful of guesthouse keepers lamented the impact of the road on their recent bottom line. We felt less guilty about not hiring a porter/guide when we were able to spend our tourist dollars at these guesthouses that hadn't gotten much foot traffic due to the road.

The lodging
And speaking of guesthouses - this is not your standard walk in the woods. Guesthouses (also known as "tea houses") have been built along the trail so that every few hours you have the option of stopping for a snack, or for lunch, or for the night. These establishments charge a few dollars for the room with the expectation that you will eat dinner and breakfast there (meals run $3-5/person, this is how they make money).

a typical guesthouse room

Some villages have one tea house, others have plenty of options. Tea house beds and services vary greatly - we are happy to share our favorite places upon request. It was nice not having to carry a tent and set up/break camp every day and we just planned our days around the village where we wanted to stop for the night.

The food
Most guesthouses have a set menu that's the same as every other guesthouse all along the trek, and because the "[village] hotel council" often approves the menu, prices don't vary much within a given village. Here's what we ate:
  • breakfast: almost always porridge, but cornflakes, eggs and pancakes are also usually available
  • lunch: rice with egg/veggies/meat, or noodles with egg/veggies/meat, or soup with chipati, or momos (steamed dumplings) with egg/veggies/meat, or rostis (hashbrown like patties) with veggies/egg/meat
  • dinner: whatever option we didn't eat for lunch

Many guesthouses also had pizza and burritos on the menu but that was almost never appealing. (Almost.)

portions were HUGE
(but we needed the carbs)

Tea and coffee are always available. Juice is available but it's usually out of a carton and tastes like Tang. Beer is available but it's not cheap; the local rice wine is cheap and is actually pretty good (by our SE Asian taste bud standards), and in apple country we tried apple cider and apple brandy - but most days we were too tired or too high up to want to drink alcohol.

Rarer treats included yak butter, yak cheese, cinnamon rolls and other pastries, sea buck thorn juice (really delicious and high in antioxidants and vitamins), apple pie, and lasagna with homemade pasta.

The cost
Including permits, bus fare to Bhulbhuli at the beginning and a taxi to Pokhara at the end, and all food and lodging along the trek, we spent $770. That's about $42/day or $21/person/day. Alcohol is pricey and some villages let you pay for wifi but it's not cheap, so keep that in mind if you're planning a trek. Food and snacks are also more pricey as you get closer to the pass since everything has to be portered or horse-carried to those villages.

The photos
... Coming soon! Or maybe in 2015! Whenever we have unlimited uploading capability, we'll share about 700 photos of our trek. So stay tuned. In the meantime, check out the highlight photos on our Facebook page...  (Update: all photos are now available on our Flickr site.  Enjoy!)

In the meantime, we're happy to answer any questions. Just leave a comment here or email us. Happy trekking!