Step 1 - pick plums. Lots and lots and lots of plums.
it helps if you have
goat helpers
Step 2 - dry plums... or not. For the first batch we made, the plums were left in a brick dry house overnight. The second batch were not. (Other than the difference in time for step 3, it's unclear whether drying them overnight made a difference. Part of the fun of this farming experience was experimentation; our hosts had only done this once before!)
world's largest dehydrator
(OK, maybe Nemcicky's largest dehydrator)
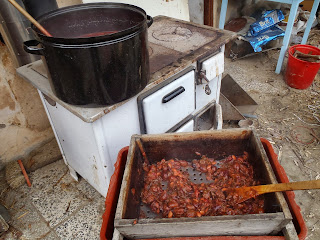
Step 3 - boil plums in a copper pot, stirring constantly, over a wood stove until the stones separate. The copper pot is key; something about the copper cooks the plums just right without changing the fruit's chemical makeup. Approximate duration of boiling/stirring: 2-4 hours.
double double
toil and trouble
Then pass plums through a wooden strainer to remove the stones and skins...
(hand strain, of course)
... and put the plum juice back in the copper pot. Stir constantly. And stir. And stir some more.
then? keep stirring...
Approximate duration of constant stirring: 6-10 hours. No kidding. First batch took about 6 hours of stirring (we helped with about 2 of those hours), second batch took about 10 (we helped with all 10 of those hours).
don't really need a gym
when you work on a farm
(but a massage would be nice)
careful, careful
don't forget to top with a little homemade plum brandy
look what we made!
goes best with homemade goat cheese
and delicious rye bread
and delicious rye bread
Definitely something we want to try to recreate when we settle back down...
we might start with a much smaller batch though


just like Aunt Pearl used to make
ReplyDeleteHave fun at the show!
Delete